Author: Fernando

  • Wow!! DDKBuild out of Vista

    About a year ago, I was reading the Windows Internals when I came in the chapter about Wow64, so I thought to myself: “Oh my… That’s a sort of thing that will bring us some issues.”

    This week I’ve installed a Vista x64 copy on my computer to do some tests and I attempted to anticipate the problems I would have when it would be released. I almost had no problems. Actually, I had to configure some shortcuts to certain programs with compatibility mode set to Windows XP SP2. This is because these programs showed the message: “This program is not compatible with Windows 6.0”

    After installing the Visual Studio 2005, DDK do Windows 2003 Server and DDKBuild, everything was working fine. A project was created, compiled and debugged in Visual Studio without problems. I also compiled a DDK example from the command line and also everything was OK. But at the time I was compiling one of the examples that I’ve already made available at the site using DDKBuild, I got the following error message:

    'ddkbuild' is not recognized as an internal or external command

    Executing the DDKBuild in a command prompt, it worked fine, but same error was always showing at the Visual Studio. After pooling out some hair, I tried to open the file DDKBuild.cmd from Visual Studio, that is, by selecting Open… from File menu and so on. When I got into the System32 directory, I saw that the file I was looking for was not there as it should be, at least, not for Visual Studio.

    It took some time, but the penny dropped. Visual Studio is a 32 bit process and fell in the Wow64 (Windows-on-Windows 64) rules for File System redirection. For those who do not know, to maintain compatibility with the past, 64-bit platforms still use the directory C: \Windows\System32 folder to put the system DLLs, even though they were 64-bits.

    But what happens with 32-bit system DLLs? Thirty-two bit processes still need to load these DLLs. When a 32-bit process tries to access the C:\Windows\System32 directory, the access is redirected by Wow64 to C:\Windows\SysWow64  (C:\Windows\System32\SysWow64 For Windows XP x64). Accesses to the registry are also reflected from 32 bits to 64 bits and vice versa. Please, refer to the MSDN site for Wow64 details.

    Once the penny has dropped, it is ridiculous to solve the problem. Simply put a copy of DDKBuild.cmd in the C:\Windows\SysWow64 and everyone will live happily ever after.

  • Walter Oney for Managers

    The fact of writing a little unusual program has some consequences. Some of your friends at work, those ones who sometimes sit beside you, do not understand what you are doing (and vice versa). Others are seen whispering: “Look out! Is that guy the one who programs drivers.” This difficulty other people have to understand what we write, ends up also affecting the managers, directors and so on. Not that they were guilty of this. After all, if they were interested in the technical area at this point, probably they would not be managers, directors or whatever they are. This is not a rule, but at least it worked in companies where I have worked for; the minority of my superiors understood those problem complexities that ended up delaying a product release.

    The worst case is when your manager thinks it’s simple to solve things. After all, when he programmed in COBOL, there was no problem he could not solve and you would probably be acting as a lazy guy or simply as a superstar for being able to solve blue screen problems. I particularly think it is beautiful when they ask: “But didn’t you already solve this blue screen problem?”, as there was only one problem what would result in a blue screen.

    Well, so I think the recognized authority’s opinion on this could have some influence over those people’s opinions. In the first chapter of his book Programming The Microsoft Windows Driver Model (2nd Edition), Walter Oney gives some tips on how a company could consider driver development to obtain results closer to the expected. I have separated some sections that it follows below.

    “The sad truth is that WDM driver programming is pretty hard, and only experienced (and expensive!) programmers are capable of doing it well.”

    “Driver programming should start as soon as there is a reasonably firm specification for how the hardware will work. You should expect to modify the specification in light of unpleasant discoveries during driver development…”

    “You should also expect driver programming to last longer and cost more that you initially imagine. All software is subject to time and cost overruns. Additional overruns in this kind of programming stem from communication difficulties between the hardware and software people, from ambiguity in specifications and in the DDK documentation…”

    “Pay attention early on to how end users will install the driver software. Most vendors of add-on hardware prefer to ship a custom installation program on a CD-ROM, and writting the installer is a lengthy process that can consume en experienced programmer for several weeks…”

    “Your driver executable will also probably include the text of messages in a special multilingual message resource, and it would be a good idea to have a trained writer compose that text. (I’m not saying your driver developer can’t do this, but he or she may not be the best choice.)”

    “Finally, don’t treat your drivers as unimportant details. Having a good driver with a smooth installation is at least as important as the exterior appearance of the product… So a myopic decision to short-fund driver development could easily have a dramatic, negative effect on your bottom line for years to come. This advice is especially important for hardware manufacturers in developing countries, where managers have a tendency to look for every possible way to cut costs. I suggest that driver development is one place where cost-based decision making is inappropriate.”

    Perhaps they will never read this, but for sure it will help us take a deep breath and continue programming. Now, you back to work because you are not getting paid for surfing the Internet! (This is also great) … 😀

  • Step into Kernel (Serial)

    I earned my first computer when I was 13 years-old, but seven years later, when I started my internship, I discovered that it was possible to debug programs that I used to write. Until then, my debug methods were always things like printing the variable value on screen. All right, in that time I didn’t use to develop complex programs enough to be stuck; over the time, I think I got used to working without the luxury as break-points and so on.

    When I was introduced to a debugger, I even paid attention to it. I thought to myself: I can just put a printf and I’ll be OK. I don’t need all this stuff. At that time, we used the CodeView, a 16-bit debugger that runs on DOS which is displayed on the picture below.

    It didn’t take long for me starting to depend on the debugger doing the simplest things, like brushing my teeth, for example. In fact, some situations, such as writing code for data collectors, writing firmware for hardware that has no display, situations in which we could not count on a serial port to see what was happening with the software, and the unforgettable situation where I had placed an oscilloscope on a particular processor pin to catch our software life signs, so, situations that we would give an arm to have a simple break-point made me realize that the debugger is really necessary.

    The funny thing is that nowadays, in college, most students in my class don’t know how to debug software. I’ve tried to explain to my friends the tremendous advantage of using a debugger, but they end up having the same reaction I had years ago: “No way, Fernando, this is too complicated. Just by looking at the source code we end up finding the mistake”. So, that’s fine for me.

    Well, we’re here to debug or to talk? Let us debug the driver generated by the traditional post Getting Started. This time we’ll do according to the tradition. We will need two machines, a Null Modem serial cable and last but not least, a copy of WinDbg. No, not worth reading this sentence again, you didn’t take it wrongly; you’ll really need two machines. I don’t know why some people have a certain resistance to believe in this. Well, I think we have overcome that phase and we can continue with the post.

    If you do not have a copy of WinDbg, you can download it for free from the Windows Debugging Tools page at Microsoft site.

    Let’s take this picture borrowed from the Windbg Help, which shows how we should set computers to do Kernel debug.

    The machine named HOST is where WinDbg will run. This machine is, in most cases, the machine where the driver was developed. Let’s assume that this is the machine where the driver was developed and defer the details about how to set the symbol and source directory to another post. The machine named TARGET is where our driver is loaded by the system. The TARGET machine’s operating system don’t necessarily need to be Checked Build nor it is necessary to install any additional kit to the operating system. All you need is your driver and a serial port. All of the Windows NT platform (Windows NT, Windows 2000, Windows XP, Windows 2003 Server and Windows Vista) already bring their native debugger since its installation. Actually, this is a great feature in the use of WinDbg. Imagine that kind of problem that manifests itself on the client machine. You will not want to install anything aggressive or even that will change the scenario that would make the problem not manifest itself anymore. Believe me, this is not so rare as it seems to be. In these cases, simply enable the Debug mode on the TAGET computer and we’re done.

    To enable the Debug mode in the TARGET machine, we need to edit some initialization parameters that are in the Boot.ini file located in the system root folder. This file has its attributes as system file, hidden file and also read-only. You may need to configure Windows Explorer to view these files. Using Windows Explorer, go to the root folder, remove the read-only property from the Boot.ini file, then open this file using a text editor like Notepad, for example. The contents of this file is similar to that shown below.

    At Operating Systems section you will need to duplicate the referenced system line you will want to debug. Add to its end the /debugport=com1 /baudrate=115200 parameters that will configure the Debug mode. The first parameter selects the COM port being used, while the second selects communication speed. The serial protocol is not the fastest communication way between machines HOST and TARGET and in some cases is annoying having to wait for interactions between WinDbg and debugee system. There are other media that can be used if your computer does not have an available serial port or if you wish more speed and comfort during the Debug. See more details in the post Serial Killers.

    The final result of our Boot.ini file should be something like shown below. I’ll skip the lines beginning that describe the operating system for better visualization putting “…” in their places.

    [boot loader]
    timeout=30
    default=multi(0)disk(0)rdisk(0)partition(2)\WINDOWS
    [operating systems]
    multi(0)... /NoExecute=OptIn
    multi(0)... /NoExecute=OptIn /debugport=com1 /baudrate=115200

    After making these changes, you can save the file and restore the original file attributes on it. In Windows XP and Windows 2003, the same described steps above could be done with the help of a tool named Bootcfg.exe. In Windows Vista, the process is quite different and I will describe it in a future post.

    Back on the HOST machine, start WinDbg and select Kernel Debug… from the File menu. You should see a window that sets the communication way. Make it so in a compatible way with what was set in the Boot.ini on the TARGET machine. In this case, we are using COM1 serial port and baud rate of 115200. Clicking on OK will make WinDbg opening the serial port on the HOST machine and it will wait until the TARGET machine be ready. At this point, we get the following messages in WinDbg command window .

    While the HOST machine waits, make sure your driver is installed on the TARGET machine and restart it. After that, when system is starting, the system loader is  displaying the options found in the Boot.ini edited by you. Select the option which appears [debugger enabled] as shown below.

    After selecting this option, the machines HOST and TARGET should connect each other and the Command window would show a text similar to that shown below.

    Microsoft (R) Windows Debugger  Version 6.6.0007.5
    Copyright (c) Microsoft Corporation. All rights reserved.
     
    Opened \\.\com1
    Waiting to reconnect...
    Connected to Windows XP 2600 x86 compatible target, ptr64 FALSE
    Kernel Debugger connection established.
    Symbol search path is: *** Invalid ***
    ****************************************************************************
    * Symbol loading may be unreliable without a symbol search path.           *
    * Use .symfix to have the debugger choose a symbol path.                   *
    * After setting your symbol path, use .reload to refresh symbol locations. *
    ****************************************************************************
    Executable search path is:
    *********************************************************************
    * Symbols can not be loaded because symbol path is not initialized. *
    *                                                                   *
    * The Symbol Path can be set by:                                    *
    *   using the _NT_SYMBOL_PATH environment variable.                 *
    *   using the -y  argument when starting the debugger. *
    *   using .sympath and .sympath+                                    *
    *********************************************************************
    *** ERROR: Symbol file could not be found.  Defaulted to export symbols for
    ntkrnlpa.exe -
    Windows XP Kernel Version 2600 UP Free x86 compatible
    Built by: 2600.xpsp_sp2_gdr.050301-1519
    Kernel base = 0x804d7000 PsLoadedModuleList = 0x805531a0
     

    Well, so far we know that the machines are connected. Pressing Ctrl + Break in Windbg, we will make the system freeze in the TARGET machine and the control is passed to the debugger. The debugger is ready to receive your commands when you get a command prompt KD indicated by the letters at Command window bottom left.

    Just to make a simple test, type “lm” command and hit enter. This command lists the modules loaded by the system. Note that the Useless driver is not on this list yet. This happens because the driver instance is configured to have its execution started manually, so, the driver has not yet been loaded by the system. Then, select the item Open Source File… from File menu and open Useless.c file. Click on the DriverEntry function name and hit F9. Although there is no visible sign, we put a break-point on this function. The fact of having no visual change is due to the fact that our module has not been loaded yet. We can be sure that the breakpoint is installed listing the breakpoints with the “bl” command.

    kd> bl
     0 e f9fb3430     0001 (0001) Useless!DriverEntry

    Now we launch the “g” command that will cause the system to return to its normal execution.

    Once the system is loaded, we will start the driver through the “net start Useless” command . When the driver starts, the DriverEntry entry point runs and consequently, we have its execution stopped at our breakpoint. The TARGET machine will freeze while the debugger has control over the system. Note that now our module is loaded, the breakpoints are easily identified by lines with red background color.

    Well, the first steps have already been done, the commands and details on how to debug the kernel for Windows would be outside the scope of this post. But a good tip on how to obtain tons of details about this subject is the Windows 2000 Kernel Debugging book. The book is not one of my favorites; it gives a good introduction to the subject besides talking about how to use and build Debug Extensions, but does not bring the used techniques by real Kernel Debugging ninja masters. Another excellent information source on this subject is the discussion list Windows Debugger Users List dedicated to Windbg. That’s all without forgetting the Help.

    This was an initial post about the subject, wait for future posts where I will give the steps about how to use Windbg with VMware and how to debug Windows Kernel with one machine using SoftIce (God rest his soul).

    Have fun… 😉

  • Off-topic HP 50G

    Finally, the exam period has ended. Now I can return to normal life, reintegrate into the society and why not, write posts. For those who did not know, I’m studying computer engineering at Universidade São Judas Tadeu. Despite my thirty-years-old, I’m still in the third year due to a hectic life that a programmer is suppose to have. I’m sure many of you know exactly what I’m talking about. I had to interrupt my course several times because of lack of money or overwork. Anyway, these past few weeks I was in a rush and I could not compose a decent post. So, you will have to be glad for some funny facts about my new best friend, the HP 50G.

    I usually say that a programmer is not a name of a profession, but a name of a disease.”Programmer: A person who suffers for programming”. One of the symptoms that I find most decisive for a programmer their great ability to associate different things with programming, even involuntarily. An example? Easy! When I was studying Industrial Informatics at ETE, there was a teacher who used to speak slowly, about 3 seconds among sentences. He looked like an android. I used to imagine that characteristic was due to the fact the teacher had little RAM, thus took a while to load a new sentence from the HD to be processed by the speech synthesizer. At that time, we said if we had paid attention, we could see a blinking LED in his ear during those breaks. Fortunately, it could be easily solved if there had been a second thread to put the next phrase in RAM as the current phrase was used by the main thread. I do not know what you think about it, but it seems disease for me. :-S

    Studying for Computational Numerical Calculus tests and armed with a HP 50G, it was inevitable to program it to automate some steps. The exercises in this subject consist basically of arithmetic, but they are long and full of little rules. Baing a Programming carrier since the age of 13, I have downloaded the manuals and got to work. When an HP is bought, it comes with a “Quick Start” document having 120 pages; but don’t worry, you can download the complete PDF manual having 918 pages in Portuguese.

    As it might be expected, I’ve found many sites and tutorials on the subject, even several in Portuguese. The site hpcalc.org was a major contributor. On the page about programming you can find a lot of things. And the best thing, it’s all for free.

    We can program the HP either in UserRPL or SystemRPL. Programming in SystemRPL gives us a performance gaining of almost 10 times higher than in UserRPL. However, everything in life has a price. The excerpt below was taken from one of the several PDFs I’ve found.

    Strange! I could swear I have already read something like that somewhere.

    Because I was unable to download a WinDbg version to debug my HP, I decided to program in UserRPL anyway. The language is basically composed of a sequence of keys that were pressed during normal use of the calculator, but we can still use execution blocks, repeating loops (for/while), conditional execution (if, else), sub-programs execution and many other things that I had no patience to read. It’s funny to mix things like IF and ELSE commands that do array operations as if they were as simple as adding one to one.

    HP can be programmed on itself, I mean using its own keyboard. But writing on that mini keyboard is similar to play Decathlon on Atari. It works, but you know what will end up happening. Another super uncomfortable thing is trying to understand what is wrong in your program just looking at the source code (which is not indented) on a small LCD screen. One of the facilities is a USB cable that connects the HP to your PC.

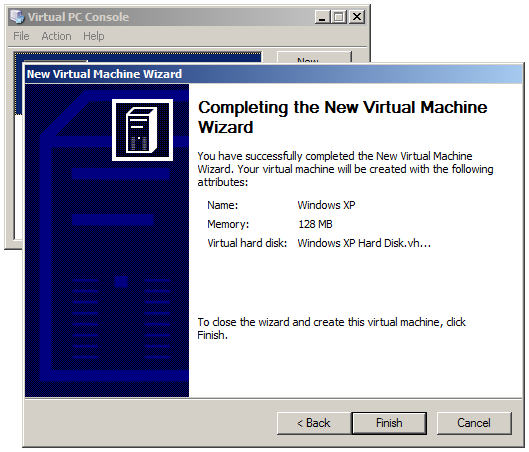
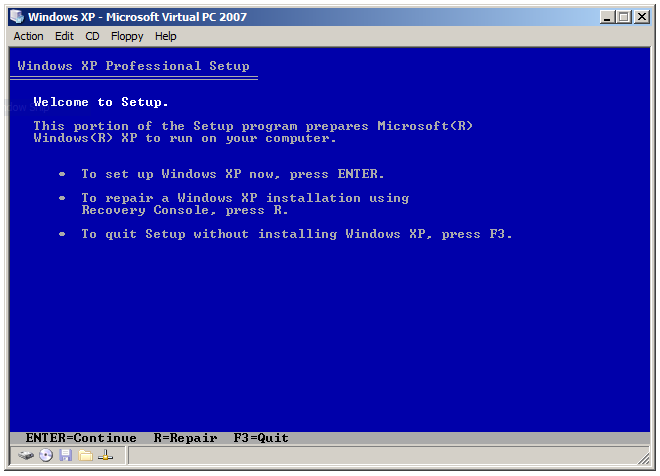
    To access the stored directories and variables in the calculator, you’ll have to download the software that makes this connection. But if you have an x64 machine (even HP), there will not be drivers available to make this connection. If this is your case, you can use a virtual machine that is running a 32-bit operating system. Wow! That really works!

    When connected, it displays a kind of “Explorer” where you can browse the folders and edit variables and programs. With a double-click on the programs, an excellent development environment called “Notepad” opens with its program. Don’t think of indenting your program. When the program is sent to HP, it takes its own indentation, which is not obviously the same as we would like to take.

    Well, at least it was interesting to learn more of this. It was really worth spending that money buying something I can program and be able to keep my addiction. But it still does not stop there. If you take a look at the quantity and variety of applications to download from hpcalc.org, you will have an idea whatelse it can do besides calculating the matrix determinant. If you’re curious, you can download a calculating emulator on your PC and make a Test Drive.

  • Kernel + Visual Studio 2005

    Driver or low-level software developer is used to build their projects on the command line, use text editors like Notepad or Norton Editor to code their drivers. It’s like my friend Thiago says: “Knife in the teeth and blood in the eyes”. Using the command TYPE | MORE to see the compilation error files shows how superior human beings we are, technology dominants who don’t under-utilize our brains, don’t need those superfluous tools like graphical interface with syntax coloring, IntelliSence or even auto-complete. We are at the top of the food chain.

    If you really believe that, then it is better you leave this post right here. Today I going to defend the use of tools that help, and much, when a driver is coded and it is needed to deal with functions with large number of parameters and endless structures.

    Using or not using the Visual Studio to generate drivers is a kind of discussion that tends to be infinite, such as the use of C++ for Kernel Mode development. On the one hand, there are those ones who argue that the environment is almost never perfectly configured to compile drivers. I’ve read posts from real authorities on the subject by talking about how many days were needed to find a bug that was generated by a compiler optimization or even a bad define that was generated by the Wizard. Those who say that use Visual Studio as development environment requires a minimum knowledge of each parameter used in the call to cl.exe; that the ideal is to use the good old Build that parse files SOURCES, DIR and MAKEFILE and be quite sure about the environment set by the DDK shortcuts is correct. On the other hand, there are those ones who do not give up the convenience of having an integrated environment, the facility just about pressing a key to see the detected error file line , the use of syntax coloring, IntelliSence, auto-complete and many other advantages that Visual Studio offers.

    I have been doing this for some time and I remember when the DDK started to bring the compiler embedded into the Windows XP kit. The main purpose of this change in the DDK was a trial to separate the driver development environment from application development environment. This link has already created many problems. The Windows NT 4.0 DDK was based on VC 4.2, but with the arrival of VC 5.0 and later VC 6.0, the symbol table format has been changed and WinDbg stopped working. At that time, I used to utilize SoftIce much more than WinDbg to debug drivers. I continued using the Visual Studio without even noticing this problem. I only had symbol problems when Visual Studio came on version 7.0. The VToolsD does not support the new symbol format yet. Conclusion, I still use VC 6.0 to compile VXDs. Actually, it’s not impossible to use VC 7.0 for this, but we won’t able to debug it.

    Later, when we did the upgrade from VS2003 to VS2005, the most drastic changes have turned my life become a little bluer. Since this time, I started using the best of both worlds, that is, the assurance of having a properly configured environment and all the tools convenience that the VS2005 editor could offer.

    How can we do it? OK, let’s use the project created in post Getting Started as a starting point. Initially we will need to download the file DDKBUILD.CMD from OSR Online and save it in a directory that would be in your machine PATH. That CMD will need the WNETBASE environment variable configured to the DDK installation base directory. This file is a way to make an external build with Visual Studio. To do this, create a Makefile project in Visual Studio as shown below.

    After entering in your new project name folder, where it will be created, just click on “OK”. Even without setting up anything, click “Finish” at the next window. After creating the project, add the files in Solution Explorer. Then edit the project properties as it is shown below. Note that in the “Include Search Path” I’m assuming that DDK installation was performed in the C:\WinDDK\3790. This field has no influence over the compilation process; it just tells IntelliSence which directories should be used to serve as sources for its database.

    From this point, we can build the project like a User Mode project. The images below do not require comments. I suppose it’s not necessary saying that drivers cannot be debugged using the Visual Studio environment. Remember that Kernel debugging requires special debuggers for that purpose as I mentioned in my last post.

    One particularly interesting window that has been added to Visual Studio 2005 is the “Code Definition Window”, displaying where symbols have been defined as you write them in the code window. See the example when I write a call to IoSetCompletionRoutine.

    At last, take a look at the options offered by DDKBUILD. You can list your choices by simply opening a command prompt window and running DDKBUILD without any parameter. Note that we can compile drivers also using the PREfast.

    That’s it… Have fun! 😉

  • Serial Killers

    There’s no doubt, they’re really giving up producing serial ports on notebooks and desktops. In this post, I will talk about some problems we encounter when debugging that driver that only reproduces the issue on that machine that has no serial ports. What alternatives do we have with this regard?

    This month new computers have arrived here in the company. In these machines, we put some of our products in beta version. For any reason, only on new machines one of our drivers was not working as it should. As the quotes of the programmer’s code of ethics, the blame is on the trainee who did the tests until otherwise could be proved. After several unsuccessful attempts to discover what was happening, I had no doubts, let’s debug it. Avoiding moving the victim to my desk to connect the serial cable, I decided to install SoftIce. But life is a surprise box and we got a nice BSOD when SoftIce was started. Wow! This is rare, but it happens. In these cases, we don’t have much choice; we really have to use Windbg. The PCs we got were Dell Dimension 5150 model. Take a look at its cabinet back in the picture and answer quickly: where is the serial port? That’s it, there is none. By consulting the manufacturer’s Web site, we found that the computer had 8 USB ports but had neither a parallel nor a serial port.

    At this moment, we made a circle and talk all together: “Oh God, what do we do now?” Some issues that happen in real machines are also reproduced in virtual ones, especially if the driver you are developing is a filter or a driver that does not deal directly with the hardware. Just for a test, we installed VMware on a new machine and fortunately the problem was reproduced. That’s one of those occasions that we get happy when the problem appears. Thereafter, I just used the old trick about having virtual serial port in a VM and redirect the data stream to a named pipe. This could become a post. 😉

    Well, after connecting the debugger, having the break-point set, it did not take long to find the problem, generating a new version, testing, making it to work and live happily ever after. But not always the history is solved with these few steps. Some virtual machines do not support USB devices. Even VMware that offers this feature still does not support human interface devices (HID) like USB keyboards and mice. Not to mention the psychological and esoteric issues involving race conditions and/or a good joint action with Murphy. What can we do in these cases besides sitting and crying?

    Fortunately, technology at the service of humanity predicted situations like these. In these cases, we traditionally have two alternatives:

    1) Describe the bug you want to delete on a sheet of paper. It is recommended that this description has sections like “Go away strange bug …”. Sew a piece of paper inside a frog’s mouth and positive thinking in solving the problem; throw the frog into a river without seeing where it would fell. After seven days, do a “Rebuild All” in your project (A reboot before the build is recommended). If the problem persists, repeat the steps. Formatting the machine helps to remove bad fluids and scare evil and haunt spirits away that torment your code. Consult a software healer for best results.

    2) Use a FireWire card and make a Windbg connection using an IEEE 1394 cable. This option is only available if the machine being debugged is a Windows XP or higher. These cards are installed on your PCI or PCMCIA bus. I did not have any chance of using this connection type to debug a machine, but it is certainly very fast and comfortable, since the data is transmitted at a rate of up to 400Mbps.

    Can I use one of those famous serial ports to USB converters that are sold at Santa Ifigenia? Although it’s not required to install a driver on your system, these adapters use drivers to work. All USB stack is mounted to make these devices work. On a machine that is being debugged in Kernel, all the code that deals with serial communication or firewire is hard-coded in the system and it works with fixed standard addresses . These adapters can be used without problems by the debugger machine, but not by the debugee one.

    What if I use a PCI multiport serial card? That depends on what I/O addresses and interrupts the card. Normally these cards use different addresses of the standards in order to not to create any compatibility issues with I/O addresses that probably pre-exist on the machine. If the card offers the option of using standard addresses, there is no problem.

    Windows Vista will support Kernel Debug via USB 2.0 port, though some conditions are required. USB cable must be special for this purpose, the debugee computer USB interface must support Kernel Debug, and last but not least, the debugger computer USB controller should be Extended Host Controller Interface (EHCI) compliant.

    If you are interested in acquiring IEEE 1394, remember that you must have, at least, two interfaces such that there is a link between the debugger and debugee machine. Although I have seen some lost comments on the Internet about FireWire x USB converter cables (for use in debugger machine), as far as I could see, they are electrically impossible to be built. That’s because the entire protocol is different. Whereas USB is a “Master x Slave” protocol, FireWire is “Peer to Peer” one. It would require some intelligent hardware along the way to do all translation.

    The company I work for is acquiring these interfaces for PCMCIA FireWire in order to eliminate the problem of debugging customer’s notebook  that is crippled serial ports. I think soon we’ll give up the frog and all. I will make some comparisons with the good old serial cable and give some news on this subject.


  • Driver plus plus

    Developing low-level software is really good. I personally love the kind of work I do. I have close friends who marvel at C++ beauty, how things appear to fit perfectly among STL, iterators and templates. My business is definitely another. Despite using C/C++, Assembly and appreciating these languages a lot, I don’t deeply dedicate myself to study C++. My practical side to solve problems leads me to do some things that would make my fried Slug want to beat me, but fortunately he is a calm person. 😛

    After my brother (Kabloc) had read my post Getting Started…, he asked me whether it’s be possible tp use C++ instead of C for developing drivers. In this post I will summarize the problems to get an object-oriented Blue Screen. I will not opine whether C++ is better or worse than C to write drivers. This is a discussion that seems to have no end. If you participate in any discussion list about driver development, you know what I mean. I personally prefer create classes, namespaces and templates that address in a modular way to my problems. That seems to be more comfortable. In fact, we can feel a certain tendency in Kernel Mode development for object-oriented programming. This is something increasingly present with DDIs (device-driver interfaces) using COM model for communication between layers in Kernel and the coming of WDF. Remember that using COM model does not mean using COM, but only the concept of derived interfaces well known as IUnknown to implement reference counters and exchange interfaces.

    First of all, let us build the sample project created in my previous post to show a driver that makes use of a class. As the tradition dictates, we’ll start thinking it’s easy and simply use the CPP file extension at source below and see what happens.

    #include  
     
    //-f--> A class with a very original name
    class MyClass
    {
    public:
        MyClass()
        {
            DbgPrint("Constructor %p\n", this);
        }
     
        ~MyClass()
        {
            DbgPrint("Destructor %p\n", this);
        }
     
        VOID SayHello(VOID)
        {
            DbgPrint("Hello from %p\n", this);
        }
    };
     
     
    /****
    ***
    **      DriverEntry 
    */
     
    NTSTATUS DriverEntry(IN PDRIVER_OBJECT  pDriverObject,
                         IN PUNICODE_STRING pusRegistryPath)
    {
        MyClass Instance;
     
        //-f--> A life sign
        DbgPrint("DriverEntry called\n");
     
        //-f--> Hello...
        Instance.SayHello();
     
        //-f--> Everything is fine so far
        return STATUS_SUCCESS;
    }

    Round #1…

    Compiling - krnclass.cpp for i386
    ...\ntddk.h(2152) : error C2220: warning treated as error - no object
                        file generated
    ...\ntddk.h(2152) : error C4162: '_ReturnAddress' : no function with
                        C linkage found
    ...\ntddk.h(6889) : error C4162: '_InterlockedExchange' : no function
                        with C linkage found
    ...\ntddk.h(6915) : error C4162: '_InterlockedIncrement' : no function
                        with C linkage found
    ...\ntddk.h(6928) : error C4162: '_InterlockedDecrement' : no function
                        with C linkage found
    ...\ntddk.h(6942) : error C4162: '_InterlockedExchangeAdd' : no function
                        with C linkage found
    ...\ntddk.h(6972) : error C4162: '_InterlockedCompareExchange' : no
                        function with C linkage found
    ...\ntddk.h(7024) : error C4162: '_InterlockedOr' : no function with C
                        linkage found
    ...\ntddk.h(7034) : error C4162: '_InterlockedAnd' : no function with C
                        linkage found
    ...\ntddk.h(7044) : error C4162: '_InterlockedXor' : no function with C
                        linkage found

    We find some definitions in ntddk.h that need to be compiled in C, and not in C++. This problem will also happen with the driver’s entry point DriverEntry. DDK expects to find this exported symbol as C. But this is still very easy to solve, just change the way we include this header and the way we declare our entry point so, that it’ll look as shown below.

    extern "C"
    {
        #include 
    }
     
    ...
     
    extern "C"
    NTSTATUS DriverEntry(IN PDRIVER_OBJECT  pDriverObject,
                         IN PUNICODE_STRING pusRegistryPath)
    {

    So, it has compiled properly. Loading this driver, we can see the following messages in DebugMon.

    Are we done? Do we already have a driver in C++? Not yet. We can already enjoy some concepts like classes, templates and overloads, for example, but let’s see what happens when we try to use the new operator.

    extern "C"
    NTSTATUS DriverEntry(IN PDRIVER_OBJECT  pDriverObject,
                         IN PUNICODE_STRING pusRegistryPath)
    {
        MyClass *pInstance = NULL;
     
        //-f--> Creating an instance dynamically
        pInstance = new MyClass();
     
        //-f--> Crashphobia
        if (!pInstance)
            return STATUS_NO_MEMORY;
     
        //-f--> Hello from heap
        pInstance->SayHello();
     
        //-f--> Releasing
        delete pInstance;
     
        //-f--> Everything is fine so far
        return STATUS_SUCCESS;
    }
     

    Round #2…

    Linking Executable - objchk_wxp_x86\i386\krnclass.sys for i386
    krnclass.obj : error LNK2019: unresolved external symbol "void * __cdecl
                   operator new(unsigned int)" (??2@YAPAXI@Z) referenced in
                   function _DriverEntry@8
    krnclass.obj : error LNK2019: unresolved external symbol "void __cdecl
                   operator delete(void *)" (??3@YAXPAX@Z) referenced in
                   function "public: void * __thiscall MyClass::`scalar
                   deleting destructor'(unsigned int)" (??_GMyClass@@QAEPAXI@Z)
    objchk_wxp_x86\i386\krnclass.sys : error LNK1120: 2 unresolved externals

    Oops! To resolve these dependencies, we have to overload new and delete operators so, that allocations would be made through the ExAllocatePool(). Let’s pass an additional parameter to the new operator so that we can choose between NonPagedPool, PagedPool and so on …

    typedef unsigned int size_t;
     
    //-f--> Overloading the new operator
    __inline void* __cdecl operator new(size_t size,
                                        POOL_TYPE pool)
    {
        return ExAllocatePool(pool, size);
    }
     
    //-f--> Overloading the delete operator
    __inline void __cdecl operator delete(void *pVoid)
    {
        ExFreePool(pVoid);
    }
     
    ...
     
        //-f--> We should specify the pool type here
        pInstance = new(NonPagedPool) MyClass();
     
    ...

    Now it compiles again and the memory allocations are made in the way it should do, but there is another problem that happens when you try to create static or global objects. Let’s demonstrate this by creating a global instance and again, trying to compile this example.

    Round #3…

    Linking Executable - objchk_wxp_x86\i386\krnclass.sys for i386
    krnclass.obj : error LNK2019: unresolved external symbol _atexit
                   referenced in function _$E1
    objchk_wxp_x86\i386\krnclass.sys : error LNK1120: 1 unresolved externals

    Since we have no support to C++ in Kernel, we have no run-time that implements all static object initialization by calling all global constructors and destructors of them. This is a process somewhat complicated and it will require some more concepts. There is a very good article from Matt Pietrek that describes this process. Looks like this will give us a lot of work, but fortunately there is a MSI that brings an implementation of Kernel C++ run-time at Hollis Technology Solutions site . The package is an open source, and thus, it brings all the source code with it (including an example) and the libraries of this implementation.

    This run-time implementation is broader than described in this post and we will have enough to play with C++ in Kernel. For C users, it brings even the definitions of malloc() and free(). The only uncomfortable thing I found in this package is a need to replace the definition of our DriverEntry() entry point to CPP_DRIVER_ENTRY.

    #include 
     
    ...
     
    /****
    ***
    **      DriverEntry 
    */
    CPP_DRIVER_ENTRY(IN PDRIVER_OBJECT  pDriverObject,
                     IN PUNICODE_STRING pusRegistryPath)
    {
     
    ...


    I’ll leave an example for downloading about how to use this package, admitting that you have installed MSI on C:\Library\HtsCpp. This example may also serve as the basis for future posts that would use object orientation feature. Anyway, the following is a preview of how your SOURCES file should be.

    TARGETNAME=KrnClass
    TARGETPATH=obj
    TARGETTYPE=DRIVER
     
    !if "$(DDKBUILDENV)" == "fre"
    BUILD_CONFIG=libFre
    !else
    BUILD_CONFIG=libChk
    !endif
     
    TARGETLIBS=C:\Library\HtsCpp\$(BUILD_CONFIG)\i386\HtsCpp.lib
     
    INCLUDES=C:\Library\HtsCpp\sys\inc;
     
    SOURCES=KrnClass.cpp

    See you! 🙂

    KrnClass.zip

  • RtlGetModuleBase & RtlGetProcAddress

    In the post ExAllocatePool (WithoutTag), I talked a little about the conflicts on using new APIs in drivers and making them incompatible with legacy systems. Our initial proposal was to have a single binary that would be able to run either in Windows NT and newer systems. We reached a solution that cannot be considered ideal, that old functions are always used on systems that support newer APIs.

    Thinking about solving this limitation, the DDK brought us MmGetSystemRoutineAddress(). Analogous to GetProcAddress() exported by kernel32.dll, MmGetSystemRoutineAddress() dynamically obtains a function address from its exported name. But the world will not still be safe while Windows NT survives. This new function has only been implemented since Windows 2000.

    We don’t have an alternative to Windows NT, so let’s make one. With one or two PE concepts, we implemented this function version. PE structure carries tons of rules, but for our need we can implement a light version. If you want details about the rules adopted by PE, you can take a look at the article An In-Depth Look into the Win32 Portable Executable File Format by Matt Pietrek.

    Well, now that we already have read the entire article and already known everything about PE, follow the basic algorithm prototype about how to walk through PE structure, looking for a specific function exported by name. This function is not provided by Windows NT DDK and is written in the example source code available for downloading.

    NTSTATUS RtlGetProcAddress(IN PVOID     pBaseAddress,
                               IN LPCSTR    pszFunctionName,
                               IN NTPROC    *pProcedure);

    Notice that the input parameters are the base address, the name of desired function and ultimately the address to the pointer that will get the obtained function address. But where will I get this base address from? Remember the functions we are looking for are exported by ntoskrnl.lib and they are implemented in the ntoskrnl.exe module. To make sure the function we’re looking for is in fact exported by this module, use the “Dependency Walker” to see this module export table. As I said before, some functions are implemented as macros, thus, its definition will be in a header file and not in the export table.

    To get the module base address that exports these functions, we use ZwQuerySystemInformation() in which, although not documented by Microsoft, there are already several publications that comment about it. Thus, we’ll define the RtlGetModuleBase() which will behave similar to the well-known GetModuleHandle(). This function is also defined in the example available for downloading.

    NTSTATUS
    NTAPI
    ZwQuerySystemInformation(IN SYSTEM_INFORMATION_CLASS SystemInformationClass,
                             IN OUT PVOID SystemInformation,
                             IN ULONG SystemInformationLength,
                             OUT PULONG ReturnLength OPTIONAL)

    There are many undocumented features and settings that can be extremely useful. The book Windows NT/2000 Native API Reference by Gary Nebbett is excellent to make use of these functions. He brings prototypes, enums, structures used in calls, descriptions of what each function does and each parameter. Here in our example, we only use the statements below for information about the modules loaded into the system address space.

    typedef struct _SYSTEM_MODULE_INFORMATION   // Information Class 11
    {
        ULONG Reserved[2];
        PVOID Base;
        ULONG Size;
        ULONG Flags;
        USHORT Index;
        USHORT Unknown;
        USHORT LoadCount;
        USHORT ModuleNameOffset;
        CHAR ImageName[256];
     
    } SYSTEM_MODULE_INFORMATION, *PSYSTEM_MODULE_INFORMATION;

    The structure “Base” member above brings us the module base address containing PE structure. In the sample code,  is RtlGetModuleBase() routine definition that has the following prototype.

    NTSTATUS RtlGetModuleBase(IN LPCSTR     pszModuleName,
                              OUT PVOID*    ppBaseAddress);

    With the union of its powers, now we can know whether a certain API is implemented in the current system and if so, get its address. So, it is perfectly possible to have a single binary that can run on both Windows NT using ExFreePool() and in later systems using ExFreePoolWithTag(). Below it is a very basic example as always. Of course, we can create a single allocation routine that would do the dirty work.

    #include "GetProcAddr.h"
     
    //-f--> Type for the ExFreePoolWithTag routine
    typedef VOID (NTAPI* PF_EX_FREE_POOL_WITH_TAG)
    (
        IN PVOID  P,
        IN ULONG  Tag 
    );
     
     
    VOID OnDriverUnload(PDRIVER_OBJECT     pDriverObj)
    {
        //-f--> That routine, even empty, is here just
        //      to allow the driver to be unloaded.
    }
     
     
    /****
    ***
    **           There once was a Driver...
    **
    */
    NTSTATUS DriverEntry(PDRIVER_OBJECT     pDriverObj,
                         PUNICODE_STRING    pusRegistryPath)
    {
        NTSTATUS                    nts;
        PVOID                       pBaseAddress, pTemp;
        PF_EX_FREE_POOL_WITH_TAG    pfExFreePoolWithTag;
     
        //-f--> Set the unload callback routine
        pDriverObj->DriverUnload = OnDriverUnload;
     
        //-f--> Get the module base address
        nts = RtlGetModuleBase("ntoskrnl.exe",
                               &pBaseAddress);
     
        //-f--> Testing the routine's return doesn't hurt,
        //      but not doing this can kill your system.
        if (!NT_SUCCESS(nts))
            return nts;
     
        //-f--> Allocating memory for a test using the Free routine
        pTemp = ExAllocatePoolWithTag(NonPagedPool,
                                      10,
                                      'tseT');
     
        //-f--> Get the function API address
        nts = RtlGetProcAddress(pBaseAddress,
                                "ExFreePoolWithTag",
                                (NTPROC*)&pfExFreePoolWithTag);
     
        if (NT_SUCCESS(nts))
        {
            //-f--> If that routine is implemented by the system, so
            //      we get a success return code here.
            pfExFreePoolWithTag(pTemp,
                                'tseT');
        }
        else
        {
            //-f--> Who has no dog, hunts like a cat.
            ExFreePool(pTemp);
        }
     
        return STATUS_SUCCESS;
    }

    Have fun! 🙂

    ExGetProc.zip

  • Legacy Drivers, WDM, WDF, KMDF, UMDF… WTF?!

    These days someone asked me what is the relationship between the operating system and the alphabet soup that has been accumulated over the builds. In this post, I’ll try to summarize what kind of each of these models brings new and what is their relationship with the operating system.

    In the beginning, God created the Earth, soon after Windows NT came and, introduced what we used to call “Legacy Drivers”. This model was used in all Windows NT drivers and there are still a lot of its concepts in the new models. Here, the classical concepts of IRP and I/O Manager have been adopted.

    With Plug-and-Play, Windows 98 and Windows 2000 advent, it was the first family to implement WDM (Windows Driver Model). This model has been intended to unify development concepts for drivers on both platforms (9x and NT). Anyone who has had contact with VXDs knows how different Windows NT drivers concepts are. VXDs programmers had to learn a completely different technology. With WDM, besides using the same sources to generate drivers for both platforms, the same binary can be used on both platforms. That is, I can generate a single binary that will run on both Windows 98 and Windows 2000. Moreover, WDM is able to identify and classify devices by Plug-and-Play class and subclass, and thus, associate drivers and filters to them. The Legacy drivers are still supported in Windows 2000 as well as VXDs in Windows 98. In practice, for NT platform, WDM drivers are Legacy Drivers that use new rules to classify and assign drivers to devices. As to the 9x platform, the change was drastic. WDM calls are routed to a VXD that makes the translation of IRP to IOP.

    As time passed by, the 9x platform ended, and the big need was to make driver development a painless thing to do. That was the priority in WDF development (Windows Driver Foundation). One comment I will not forget was the one about KMDF video (Kernel Mode Driver Framework) on Channel9 that says: “It’s hard to write kernel mode driver. Really hard. In fact, it’s hard to believe how hard it is. Well, Windows Driver staff has worked hard to become a little less difficult (not easy) to write kernel mode drivers that do not knock your system down. You know, blue screens and stuff”. WDF brings a lot of things already done, details that were repetitive, even in WDM, now there is a default behavior in WDF but that may change as the need. Applying a bigger abstraction allows, for example, registering callback routines to handle only interest events and lets the framework take care of the power management, say by the way. Impressive, don’t you think? Greater abstraction does not necessarily mean less control. You can still have access to all IRP members you think that is easy for you and want to do this with your own hands.

    I’ve read in one of these articles from NT Insider that a developer still has to know too much to do too little in Kernel Mode development and Microsoft wants to change that. Developers could know less about so many things involved in driver development to do something simple. WDF is composed of KMDF and UMDF (User Mode Driver Framework). That’s right! User Mode. Ensuring that drivers are less harmful to the system and therefore prevent a flaw in a driver that is not critical to the system (such as your MP3 player) causes a blue screen and drops your whole system. It’s really interesting to see how this works. Your driver runs as a COM server, using a system account and uses a communication framework that is based on COM to have interaction with the system as if in Kernel Mode. There is one .ppt very interesting that was used in the WinHEC 2006 that shows in a simplified way how it happens. It isn’t possible develop .net drivers because of impact of system performance, but it is desirable, no doubt. It is clear that only certain types of devices can work in User Mode, but for the growing line of USB devices it’s been already real. WDF will come along with Windows Vista DDK, many (not to mention all) of drivers of the new system were migrated to WDF, but this is not a luxury only for Windows Vista. KMDF can even be installed on Windows 2000 SP4 and UMDF beta can be installed on Windows XP SP2.

  • Getting Started…

    Let’s just stop the idle talk and get our hands dirty. Answering some requests, in this post I will take the steps to develop a minimum driver. At the end of this post, we will have a module that will be installed and loaded into the kernel without any functional purpose. I am not gonna talk yet about process context, Devices, Symbolic Links, IOCTL, IRP, DPC, ISR, FGTS, IR, or even about IPTU. I’ll talk a little about everything over time. Today we’ll just build from scratch an empty module that could eventually serve as a starting point for future experiments.

    To compile a driver for Windows, we need minimally the Windows Device Driver Kit (DDK). The DDK can be obtained from the Microsoft website. There are some alternatives to get the DDK, but the most economical of them is to opt  for downloading the ISO file. When this post was created, the version available on the site was the “Windows Server 2003 SP1 DDK” with 230 MB.

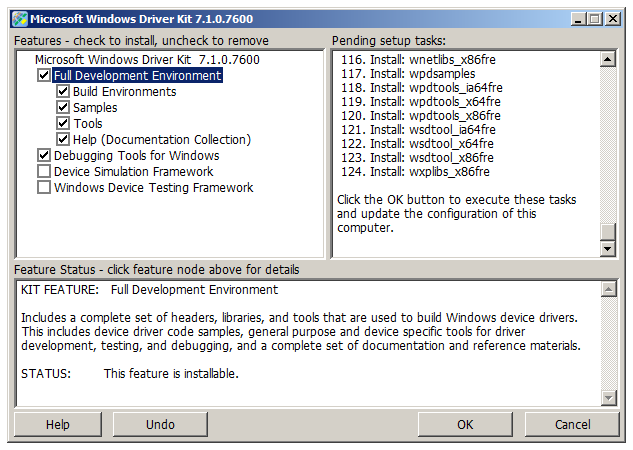
    I do not think it’s necessary to provide each detail about the DDK installation, something like “Take the mouse to the button which the text on it written NEXT and press the left mouse button”. The default options are more than sufficient for our experiments. If you don’t have much on disk space, change the options of “Build Environments” to be installed only Windows 2000 environments, as it appears below. This will make the necessary space drop from 628 MB to 246 MB. If you still have trouble installing the DDK, you might consider professional help.

    After installing the DDK, we have everything we need to create drivers. Obviously, there are many other tools that make our work more comfortable, but in this post we will stay on bread and water.

    For our test, create a folder where we put the driver source (e.g. C:\Projects\Useless). Inside this folder, create a text file named “Useless.c” and use your text editor from the bottom of your heart to enter the source below. Not worth using “Microsoft Word”, but if you thought it, use the “Notepad” and seek for professional help.

    #include 
     
    VOID OnDriverUnload(IN PDRIVER_OBJECT   pDriverObject);
     
    /****
    ***     DriverEntry 
    **
    **      That's the entry point of our driver, everything starts here,
    **      and later it'll get confused and confused...
    */
     
    NTSTATUS DriverEntry(IN PDRIVER_OBJECT  pDriverObject,
                         IN PUNICODE_STRING pusRegistryPath)
    {
        //-f--> If there is a debugger attached to the system,
        //      we could see the message below.
        DbgPrint("Wow, it's really working!\n");
     
        //-f--> Here we inform the system that our driver can be
        //      unloaded dynamically and the callback routine that
        //      will handle the completion of all is the OnDriverUnload.
        pDriverObject->DriverUnload = OnDriverUnload;
     
        //-f--> Phew! We were able to get here, that deserves
        //      a success return code to the system.
        return STATUS_SUCCESS;
    }
     
     
    /****
    ***     OnDriverUnload
    **
    **      Callback routine that deals with the necessary
    **      terminations to get this driver unloaded.
    */
     
    VOID OnDriverUnload(IN PDRIVER_OBJECT   pDriverObject)
    {
        //-f--> If there is a debugger attached to the system,
        //      we could see the message below.
        DbgPrint("But now? I did nothing so far...\n");
    }

    After doing “Copy” and “Paste” from the source above, we can notice some points. In this example, remember saving your source file with extension “.c”; otherwise, we will have some problems in exporting our entry point. In a few posts, I intend to demonstrate how to have “.cpp” files and how to use object-orientation in building drivers. Another important point to be noted is that the use of  DriverUnload callback function is optional. If you don’t wanna provide a callback function for the driver unload notification, just don’t do this assignment. However, in these circumstances the driver will not be able to be unloaded. You need this assignment even for an empty function, so that its driver is able to get turned off. Let’s talk about this in more details later (see details in the DDK).

    It is still necessary to create files that define the project. In the same directory as the source, create a file named “makefile” and copy the text below to it. This file simply implements the real “Makefile” that is used to build various DDK components.

    !INCLUDE $(NTMAKEENV)\makefile.def

    The makefile should never be edited. All settings what type of driver will be compiled on, which sources will make up the driver, which libraries will be used and many other settings are specified in the file named “SOURCES” that must exist in the same directory. Its content is the one that appears below. In conjunction with the “makefile.def” from DDK, these files create a series of macros that greatly facilitate the project file creation as a Visual Studio “.vcproj”. Posts about how to use Visual Studio 2005 to compile drivers are also on my list of tasks.

    TARGETNAME=Useless
    TARGETPATH=obj
    TARGETTYPE=DRIVER
     
    SOURCES=Useless.c

    There are too many details to be discussed on a file “SOURCES” for now, let’s just limit it to know that your final binary name is defined by “TARGETNAME” variable, and the list of source code that makes up your driver should be set in “SOURCES” variables separated by space. (For more details, see it in DDK).

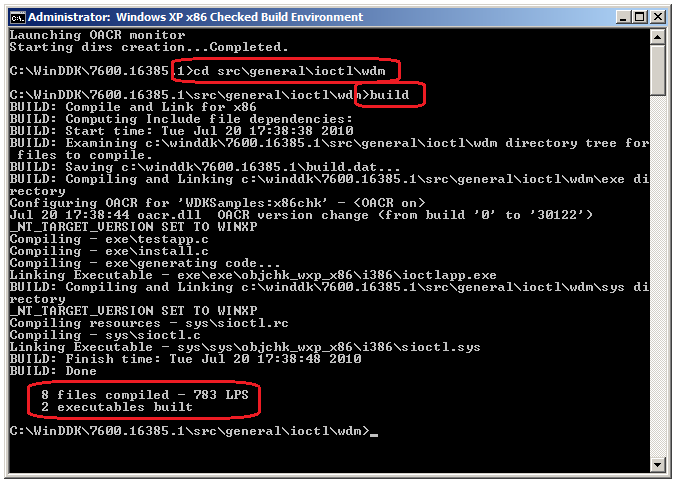
    At last, after having the files created, let’s compile them. For this, we must set some environment variables to define where the libraries, headers and binaries are that will compile your sources. Installing DDK provides a shortcut on your Start Menu that points to the file “setenv.bat”. This shortcut opens a console window and sets up the environment to compile the driver. You find the shortcut in “Build Environments” that was installed in your Start Menu. Should there be a “Checked” and a “Free” version of this shortcut. Whereas the “Checked” version sets up the environment to generate drivers with debug information, “Free” version sets up the environment for their final version, which is equivalent to “Release”. Selecting the “Checked Build” from “Windows 2000” menu, we will have a Command Prompt window with the title as shown below. Follow the same image steps below to get the same results.

    Launching the command “build”, we should have the following results:

    All done now, we just need a victim, or rather, a volunteer. It could be your cousin’s computer, a younger brother’s, an intern’s, or just anyone’s that is not bigger than you or also a person’s who can not make you lose your job. Try not to use your own machine, we may need it later. Usually I use virtual machines; they are perfect victims. Next, we will install our driver by the simplest way I know. We will edit some entries at the registry and restart the system. There are some APIs and tools that register the driver and put it to work right away without restarting the system, but remember, we are just on bread and water.

    Firstly we copy the “Useless.sys” file that was generated in subfolder “objchk_w2k_x86\i386” of our project to the folder “\Windows\System32\drivers”. Then, using the registry editor, you need to create the “Useless” key inside the “Services” key of the system and put the values as shown in the figure below.

    These lines are the minimum for a driver in the registry. The “Type” value specifies a Kernel driver, the “Start” value indicates that it will be started manually and finally the “ErrorControl” value tells the system how it should behave if this driver fails in its load time (details, details and details…).

    At this point, we have to restart the system, so that the system becomes aware of this new module. Our driver won’t start automatically. Once the system has restarted, go to the Console Prompt and start the driver with the command “net start Useless”. Isn’t it impressive as anything happened? This means that the driver is doing exactly what it has been intended to do, “Nothing”. You can stop the driver using the “net stop Useless” command. If we had the debugger attached to the system, we’d have the following outputs.

    For those who have never created a driver before and cannot see the output in WinDbg, it becomes very frustrating, because nothing happened to prove that our driver was really loaded and running in Kernel. To give a little more action to this monotony, modify the DriverEntry() function as shown below. Recompile the driver, replace it at the directory “\Windows\System32\drivers” and finally reboot the machine.

    NTSTATUS DriverEntry(IN PDRIVER_OBJECT  pDriverObject,
                         IN PUNICODE_STRING pusRegistryPath)
    {
        //-f--> Say hello to the BSOD and get used to it...
        *(PVOID*)0x00000000 = 0;
     
        //-f--> We wont survive to see this.
        return STATUS_SUCCESS;
    }

    In this case, when the driver starts, it will try to write at zero address; an exception is thrown here and we will have our first Blue Screen of Death (BSOD). Have fun!

    I’ll try to interim posts for beginners with more advanced ones in order to try to attract the attention of both groups. In this post we have nothing very useful, but we already have the basis for people who have never had contact with this type of development before, so they can do their first step. Every citizen has the right to create a Blue Screen. 😉