


As some of you already know, next August 14 the seventh programmers meeting of the C/C++ Brasil group will take place. Once again, it will be a great pleasure to take part in the event as a speaker and to have the opportunity to talk a little about driver development (for a change). 😉
My first participation in this event was in its fourth edition, where I gave an overview of Windows driver architecture and development. The slides of that talk can be downloaded from this post. Although the feedback was very good, I received some suggestions about showing more source code. Driver development requires a lot of concept, both about the operating system and about the rules imposed by the I/O Manager and its inseparable friends. So, I imagined that showing source code about structures and rules unknown to most of the talk’s participants would sound like a boring lullaby. But there is no way around it, what a programmer really likes is source code.
It was in the sixth edition that I had my second participation. This time I focused on the characteristics of virtual-memory operation and use by drivers, giving more emphasis to the names of the routines that drivers use to obtain the Kernel’s services. Yeah, although it improved, it still was not enough. The feedback result once again revealed that practical examples and source code were missing for the folks.
In this seventh edition I am going to practically write, compile, install, run and debug an example driver. All right there on the spot. The proposal of this talk is to demonstrate how to take these first steps to have a compiled driver right there on your own notebook.
Although this information is also on the event page, here are the topics that will be presented by me:
- What the Windows Driver Kit is
- Device Drivers and Software Drivers
- The WDK and the files of a project
- The DriverEntry and DriverUnload routines
- Hands on: Writing and compiling a driver
- Testing drivers on virtual machines
- Hands on: Installing the example driver
- Debugging the Windows Kernel
- Hands on: Debugging your driver
- The Blue Screen of Death (BSOD)
- Hands on: You never forget your first Blue Screen
- Generating crash dumps
- Hands on: Analyzing your crash dump
- Questions, panic and depression
Seems like a lot? Yeah, for this to be possible in the time I have available, it will be necessary to already have the environment prepared. You will not want to watch a one-hour talk that explains where to download the tools, how to install them and how to prepare a virtual machine to serve as a test environment for your new driver. If all this is done on the day of the event, once again I will owe you the source code and will probably be hanged in the public square. I don’t know about you, but I would not want that to happen.
Downloading and Installing the WDK
The first step of this preparation is to download Microsoft’s driver development kit, the Windows Driver Kit (WDK). This kit contains the headers and libraries needed so that your driver can use the routines exported by the Kernel, allowing your driver to interact with the rest of the operating system. Besides the headers and libraries, the kit also brings the compiler and the system debugger, making this kit the only tool needed to have a driver compiled and debugged.
I haven’t yet mentioned the many, many driver examples that the kit brings, as well as all the documentation needed to use the routines exported by the Kernel. This documentation serves not only as a reference, but also as a driver-building guide. Although the documentation proposes to serve as a driver-building guide, I still strongly recommend reading books dedicated to this activity. Books manage to expose the ideas more clearly, addressing the subjects gradually.
The fact that there is a compiler in this kit does not mean that there is a development environment specific to drivers. What I mean is that there is no version of Visual Studio specific to drivers, nor even a plug-in that could be installed in Visual Studio to add such functionality to the environment. In the most basic case, the sources could be edited in good old Notepad. This does not prevent us from using our beloved editor to write drivers, as this other post shows. In fact there are some tools for this purpose, such as VisualDDK, but it is nothing official.
Downloading the WDK is easy and painless. And when I say painless, I am also referring to the financial sense of the idea. The first step is to download the WDK, which is available at the Microsoft Download Center. Following the instructions, you will download an ISO of approximately 620MB that will contain the entire installation.
The ISO can be burned to a CD, or you can simply use one of those applications that creates a virtual disk drive from an image file. If you don’t have any such application on hand, you can download and install for free the OSR OsrVirtualCdAndDisk.
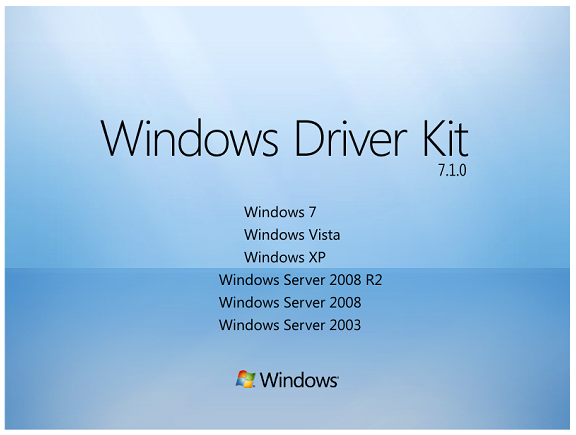
After inserting the CD, run the KitSetup.exe application that will be in the CD’s root folder. Doing this you will see the Windows Driver Kit 7.1.0 splash screen as shown below.
Then the window shown below.
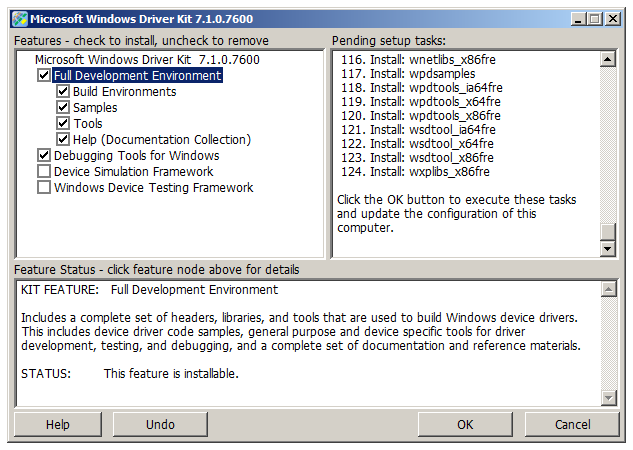
Select the items as shown above, leaving the “Device Simulation Framework” and “Windows Device Testing Framework” items unselected. Then click OK to see the next window as shown in the figure below.
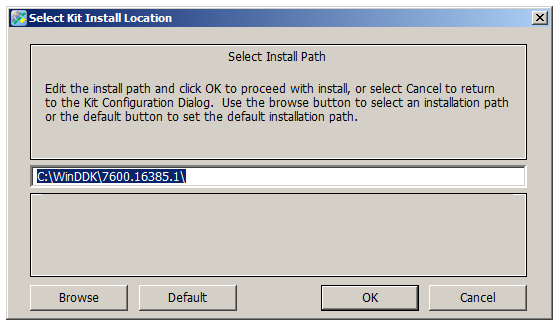
At least for the talk, simply accept the suggested installation path; this will avoid setbacks during the talk. Clicking OK in this window, just accept the installation terms and click OK in the window shown below to finish installing the WDK.
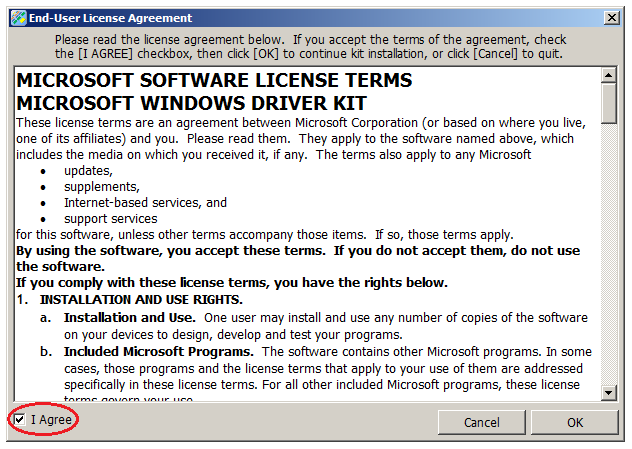
Wait for the file copy to finish and the installation will end.
Just a quick little compile, only to…
After installing the WDK you can make sure everything is right simply by compiling one of the examples installed by the kit itself. To do this, open the build command prompt as demonstrated in the figure below.
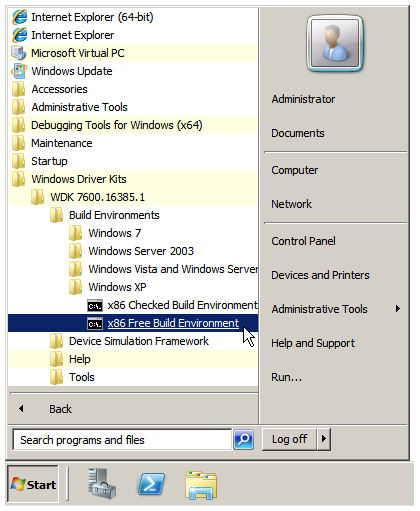
This command prompt is different from the conventional one because it is already properly configured with the environment variables needed to compile drivers for Windows XP. More details about this in the talk. With this command prompt, execute the steps indicated in the following figure.
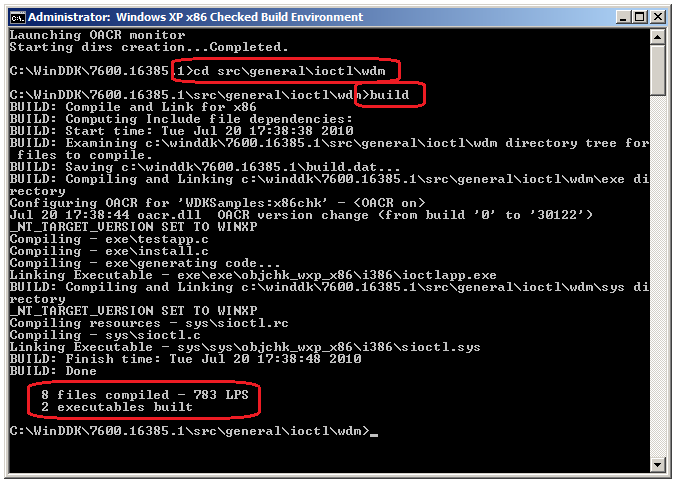
Make sure the example was compiled by checking the compiler’s output as highlighted in the figure above. If you have any problem following these steps, send me an e-mail and we’ll duke it out and everything’s fine.
Downloading and Installing Virtual PC
Having the development environment configured is essential for driver development, but it would be of no use if you don’t have a test environment. Don’t make the mistake of using your own development machine as the test environment. At least try to use an intern’s development machine or whatever. Consider that you are not going to write an application that, in the worst case, will result in the sonorous BAM. Depending on the type of driver and the size of the blunder you pull off, your machine may become unusable, no longer boot or even have corrupted data.
Debugging a Kernel driver requires special conditions. Strictly speaking, two machines are necessary for this task. That’s right, two machines. What were you thinking? That you would be able to put a breakpoint in your driver, interrupt its execution and ALT+TAB to take a little look at the local-variables window? No way, buddy. When a breakpoint interrupts the operating system, the whole of Windows stops. The mouse doesn’t move, the window doesn’t repaint, the scheduler doesn’t work, nothing at all. That is why we need a second machine. Of your machines, one of them will be your victim, the machine on which your driver will run and which will be completely frozen when necessary. The other will be your development machine. On it will be the source codes, the symbols and the debugging environment. It is on your development machine that the little local-variables window will appear.
Nowadays we can resort to virtualization to save time and space on our desks. Using a virtual machine we can have the environment we need to continue the talk and test the driver that will be developed. Virtual machines help in many cases, mainly in cases of developing drivers that do not deal with hardware directly. This is the case of anti-virus, firewall, file system drivers, some types of USB drivers and others. On the other hand, if you have, for example, a PCI card to do port I/O, handle interrupts or even do DMA, a VM will not help much, but that is another case.
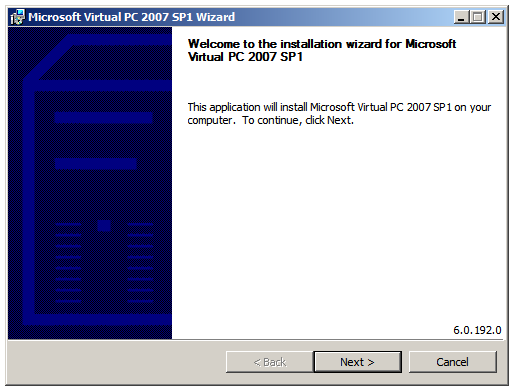
The Virtual PC is a free Microsoft tool and can be downloaded from this link. Running the downloaded file, we will have the following window as listed in the figure below. Just click Next for the next window.
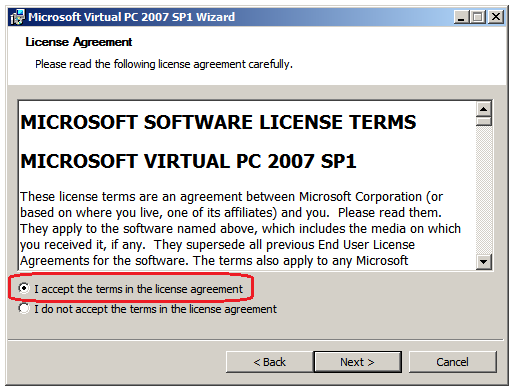
Accept the product terms and click Next to continue the installation.
Just accept the suggested destination directory and click Next.
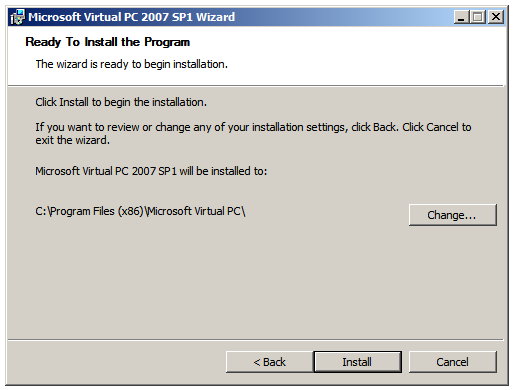
After waiting for the file copy, finish the installation.
Creating a new VM
This is not a blog specialized in virtual machines, so don’t even try to send me e-mails with hairy doubts about this subject. However, I can help with creating the virtual machine we will use in the talk. After all, we will have to destroy something, otherwise it would be kind of dull.
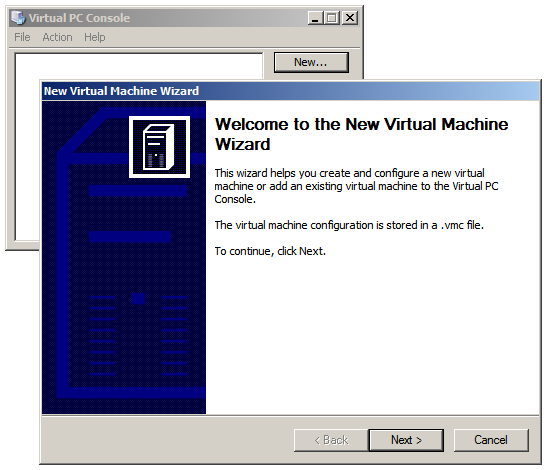
On this initial screen shown above, just click Next to continue with the installation.
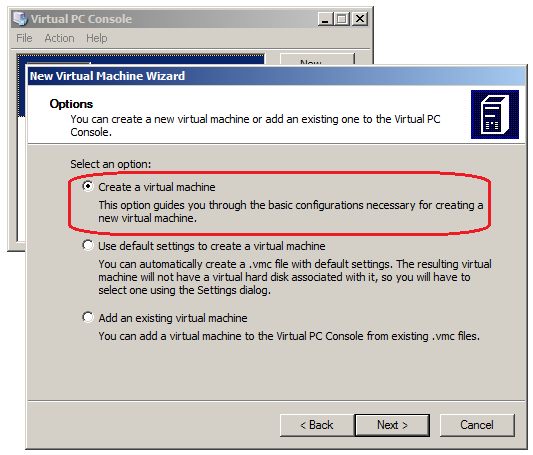
Here select the option to create a new virtual machine and then click Next to continue.
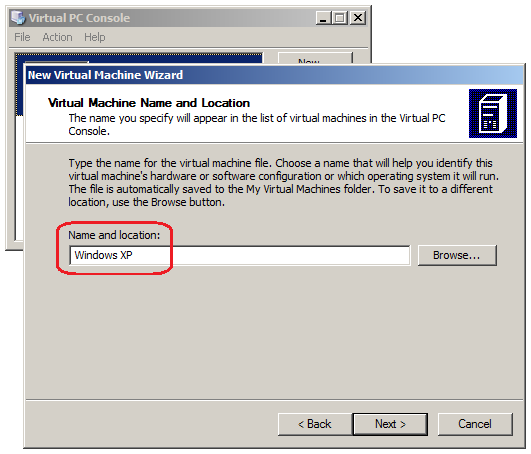
In this step you give the name of your virtual machine. Feel free to put whatever name you find most appropriate. Joe, Jack and Bob are some valid options, but for the sake of clarity I’ll prefer “Windows XP” itself.
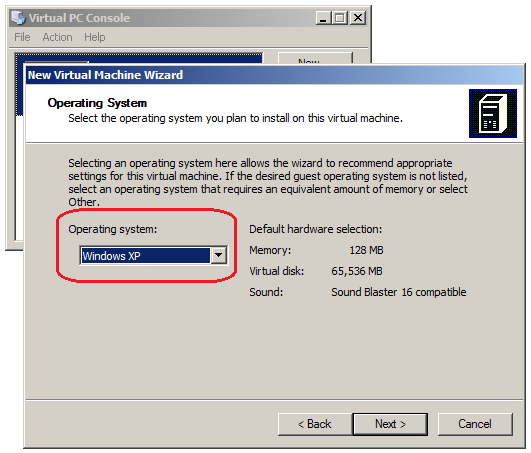
In this step we select the operating system that will be installed on this new machine. This serves so that the VM can install the right integration tools. In short, select Windows XP and click Next to continue.
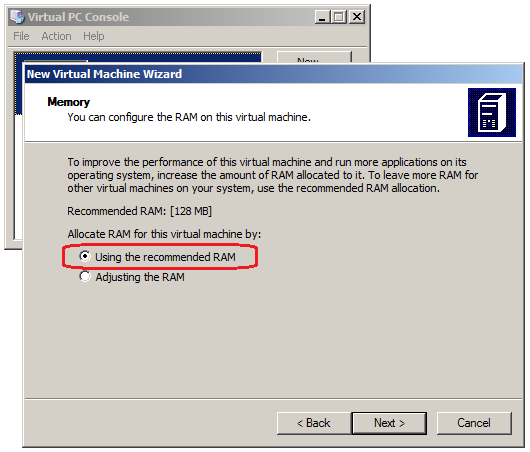
Just accept the amount of memory recommended by the Wizard and click Next.
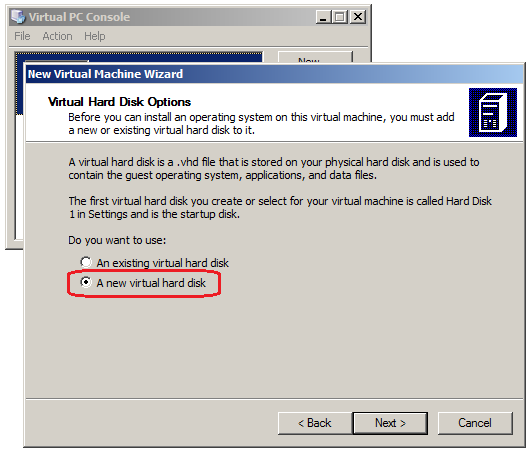
Since we are going to do a new installation of Windows, we will need a new HD that will be formatted by the Windows installation. Select the option indicated in the figure above and click Next.
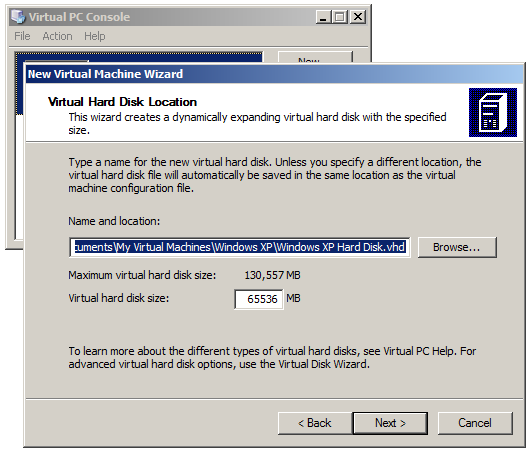
Well, here you determine where the file that represents the hard disk will be created. Without much fuss just accept the suggested path and click Next to continue.
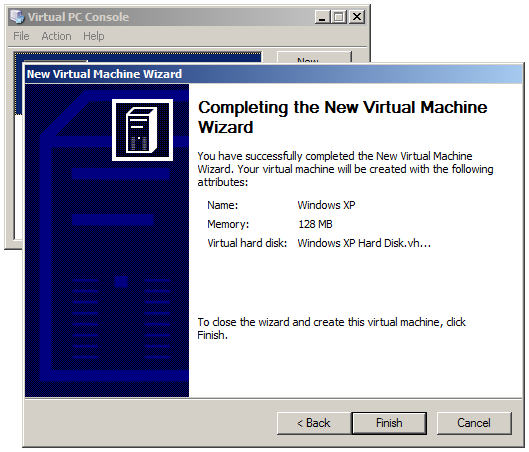
Finish creating your new virtual machine by clicking Finish and that’s it.
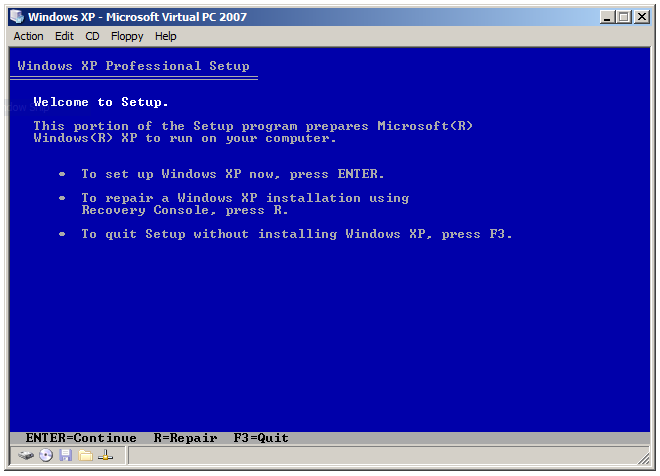

Phew! Now your virtual machine is ready to receive a new operating system.
From this point on you can install a copy of your Windows XP. Other versions of Windows could be installed, but in order to avoid differences in the debug settings during the talk, let’s agree to install Windows XP itself.
If you don’t have a copy of Windows XP to install, there is not much I can do to help you. The most I can do is give you the following advice: Go to the Santa Ifigênia church, which is on Santa Ifigênia avenue right in downtown São Paulo, and light a candle to the saint. While you’re there, take a stroll through the local shops. I’m sure you will receive a light on your path.
Now I’ll stop here, otherwise I won’t have much to talk about on the day of the talk. Take this opportunity to learn the basic concepts (and I do mean basic) about how to generate your first driver, your first blue screen and finally do your first crash analysis. Think that one day you will be able to tell this to your grandchildren. Although it won’t help much, they won’t have the slightest idea what you are talking about and will end up committing you to an institution anyway.
Hope to see you there. See ya!
Leave a Reply