

After a pinch of virtual memory to understand the most relevant concepts and take a good stroll through the data-transfer methods between application and driver, today we are going to close this trilogy talking about the data-transfer methods in IOCTLs. If you do not know how to create or use IOCTLs, this other post may help.
Flags do not help here
In the post about the data-transfer methods it was seen that we define the transfer method through a bit mask located in the Flags field in a DEVICE_OBJECT. The method chosen here defines how the I/O Manager will handle the data in the driver’s read (IRP_MJ_READ) and write (IRP_MJ_WRITE) operations. The chosen method is applied to both operations. We cannot have writes using one method while reads are performed using another. In the case of IOCTLs, the story is different. The transfer method is chosen when you define the control code using the CTL_CODE macro.
#define IOCTL_Device_Function CTL_CODE(DeviceType, Function, Method, Access)
For a more detailed explanation about the use of this macro, visit this post, or take a look at the reference. Here I will only comment on the data-transfer methods, which is selected by the Method parameter of this macro. The use of this macro to define IOCTLs is normally done in a header file that will be shared between the application and the driver. The definition of this macro is obtained from the Windows.h header for User-Mode and Ntddk.h for Kernel-Mode. Below is the definition of the IOCTLs we will implement in this post.
//-f--> Here we define the copy IOCTLs using the
// different data-transfer methods between
// application and driver.
//-f--> Using system copy
#define IOCTL_COPY_BUFFERED CTL_CODE(FILE_DEVICE_UNKNOWN, \
0x800, \
METHOD_BUFFERED, \
FILE_ANY_ACCESS)
//-f--> Locking the application pages
#define IOCTL_COPY_DIRECT CTL_CODE(FILE_DEVICE_UNKNOWN, \
0x801, \
METHOD_OUT_DIRECT, \
FILE_ANY_ACCESS)
//-f--> Come what may
#define IOCTL_COPY_NEITHER CTL_CODE(FILE_DEVICE_UNKNOWN, \
0x802, \
METHOD_NEITHER, \
FILE_ANY_ACCESS)
As you can observe, we can have different data-transfer methods for different IOCTLs. In this post I will create a driver that offers three IOCTLs that simply copy the data received in the input buffer to the output buffer. What we will have to do initially is use the CTL_CODE macro to create the IOCTLs for the services that our example driver will offer. The complete code of the example driver is available for download at the end of this post.
Come on, Fernando, I included Windows.h in my test application, but the definition of the CTL_CODE macro is still missing and I get the error message below. Am I using an incomplete Windows.h?
Z:\sources\testapp.cpp(45) : error C3861: 'CTL_CODE': identifier not found
The thing is this: The Wizard of the more recent versions of Visual Studio creates the StdAfx.h file containing, among others, the following lines:
#define WIN32_LEAN_AND_MEAN // Exclude rarely-used stuff from Windows headers
// Windows Header Files:
#include

Notice that the WIN32_LEAN_AND_MEAN symbol is defined before the inclusion of the Windows.h file. In order to gain compilation speed, this symbol avoids the declaration of some tons of definitions that are rarely used by applications. What is happening is that the CTL_CODE macro is one of these rarely used things. Yep, man, interacting with drivers is not for just anyone. Anyway, to solve this problem you just comment out the definition of this symbol and everyone will live happily ever after.
Hold on there, Fernando! Everyone except me, who did not use the Visual Studio Wizard. I am using the SOURCES file to compile my application. The fact is that in my source there is no definition of that so-called “Win32 Lemming“. What is the little excuse now?
If you are using the SOURCES file to compile your test application, just as I am doing in this post’s example, you will need to add the highlighted line below so that the WIN32_LEAN_AND_MEAN symbol is not defined by the WDK’s default makefile.
TARGETNAME=TestApp
TARGETTYPE=PROGRAM
USE_LIBCMT=1
UMTYPE=console
NOT_LEAN_AND_MEAN=1
SOURCES=TestApp.cpp
Using a system buffer
The first method we will see here is Buffered I/O, defined by using the METHOD_BUFFERED value as a parameter of the CTL_CODE macro. Here we will not have any big news for those who read the previous post. The big difference here is that in the same call to the driver, two buffers are passed to the DeviceIoControl function, one for input and another for output. Here the I/O Manager will allocate a single system buffer with a size equal to the larger of the two. Confusing? An example helps. In a call where the application offers the input buffer with 50 bytes and an output buffer with 100 bytes, the system buffer will be allocated with 100 bytes. The I/O Manager will copy the 50 bytes of the application’s input buffer to the system buffer. The IRP is sent to the driver, and when it is completed, the I/O Manager copies the content of the system buffer to the application’s output buffer. The number of bytes copied back to the application is determined by the pIrp->IoStatus.Information field, just as in the previous post.
An important thing to be noted here is that, since the system buffer is a single one for both the input and the output of the data, the driver needs to read the input data before starting to write the output data, which would overwrite the input buffer.
As I have already mentioned, our example driver is going to copy the input buffer to the output buffer. Let us take a look at the implementation of our routine that will handle the IOCTL that will use a system buffer. Read the comments.
/****
*** OnCopyBuffered
**
** IOCTL handler routine responsible for
** copying the input buffer to the output
** buffer. (using METHOD_BUFFERED)
*/
NTSTATUS
OnCopyBuffered(IN PDEVICE_OBJECT pDeviceObj,
IN PIRP pIrp)
{
NTSTATUS nts;
PIO_STACK_LOCATION pStack;
//-f--> We get a pointer to the current stack
// location.
pStack = IoGetCurrentIrpStackLocation(pIrp);
//-f--> Output of the obtained values.
// Notice that the input buffer and the output
// buffer are the same. This means that you
// cannot write to the output buffer until you
// have read all the bytes of the input buffer.
DbgPrint("========== OnCopyBuffered ===========\n"
"Input buffer address: 0x%p\n"
"Input buffer size: %d\n"
"Output buffer addres: 0x%p\n"
"Output buffer size: %d\n\n",
pIrp->AssociatedIrp.SystemBuffer,
pStack->Parameters.DeviceIoControl.InputBufferLength,
pIrp->AssociatedIrp.SystemBuffer,
pStack->Parameters.DeviceIoControl.OutputBufferLength);
//-f--> Let us check whether the input buffer fits in the output
// buffer before doing the copy.
if (pStack->Parameters.DeviceIoControl.OutputBufferLength <
pStack->Parameters.DeviceIoControl.InputBufferLength)
{
//-f--> Oops!
nts = STATUS_BUFFER_TOO_SMALL;
pIrp->IoStatus.Information = 0;
}
else
{
//-f--> Copy what for?
// Since the input buffer and the output buffer
// offered by the application are copied into a
// single system buffer, we do not need to make
// any copy. The I/O Manager will already do that for
// us. We will just tell the application how many
// bytes are valid in the output buffer.
nts = STATUS_SUCCESS;
pIrp->IoStatus.Information =
pStack->Parameters.DeviceIoControl.InputBufferLength;
}
//-f--> Close the bill and draw the line.
pIrp->IoStatus.Status = nts;
IoCompleteRequest(pIrp, IO_NO_INCREMENT);
return nts;
}
Locking the Application’s memory
Although the IOCTL is a request normally used for control, nothing stops us from using this means of communication to obtain or send data to the driver. If, in these reads or writes, large volumes of data are exchanged, the Buffered method becomes not very efficient. Using the Direct method there will be no intermediate copies into a system buffer. Nothing very different from what we already saw in the previous post, but here we have two buffers in a single call. The input buffer missed school on the very day of the lesson about MDLs, and for that reason it still reaches the driver using a system buffer. That is right! Just like the buffered method. For this reason, we will not use the input buffer to send large amounts of data to the driver.
But what if I want to send a large amount of data to the driver through an IOCTL? Here the conversation bends a little. Note that to use the Direct method in IOCTLs, we can use either the METHOD_IN_DIRECT or the METHOD_OUT_DIRECT parameter. With the Direct method, you can use the output buffer as input for the driver. Huh? All right, let us go slower. Both options create an MDL to describe the pages that make up the output buffer offered by the application. When the IRP reaches the driver, you use the MmGetSystemAddressForMdlSafe function to obtain a System Space pointer that maps the same physical pages offered by the application. This means that the pointer you receive will write directly to the pages offered by the application. I know! If the pointer points to the same pages as the application, then can we read the data contained in these pages? That is exactly it. We can send data to the driver by filling the output buffer before calling the DeviceIoControl function. So, when the driver receives the IRP, it can read this data. This allows the driver to receive large amounts of input data, but using the output buffer. The METHOD_IN_DIRECT parameter signals to the I/O Manager that the buffer that will be used to build the MDL will be used for reading, so the buffer is tested for reads in the process of creating the MDL. Alternatively, the METHOD_OUT_DIRECT parameter indicates that the buffer will receive reads and writes from the driver.
Remember that METHOD_IN_DIRECT or METHOD_OUT_DIRECT only defines the type of test that will be done on the output buffer, allowing the driver to read the output buffer. The input buffer will always come by means of a system buffer. Yeah yeah yeah, can we get to the code please?
/****
*** OnCopyDirect
**
** IOCTL handler routine responsible for
** copying the input buffer to the output
** buffer. (using METHOD_DIRECT_XXX)
*/
NTSTATUS
OnCopyDirect(IN PDEVICE_OBJECT pDeviceObj,
IN PIRP pIrp)
{
NTSTATUS nts;
PIO_STACK_LOCATION pStack;
PVOID pOutputBuffer;
//-f--> We get a pointer to the current stack
// location.
pStack = IoGetCurrentIrpStackLocation(pIrp);
//-f--> The output pointer comes from an MDL created
// by the I/O Manager.
pOutputBuffer = MmGetSystemAddressForMdlSafe(pIrp->MdlAddress,
LowPagePriority);
if (!pOutputBuffer)
{
//-f--> Oops! We are out of resources to map the
// pages described by the MDL in System Space.
pIrp->IoStatus.Status = STATUS_INSUFFICIENT_RESOURCES;
pIrp->IoStatus.Information = 0;
IoCompleteRequest(pIrp, IO_NO_INCREMENT);
return STATUS_INSUFFICIENT_RESOURCES;
}
//-f--> The input pointer, on the other hand, always comes through a
// system buffer as in the Buffered method
DbgPrint("=========== OnCopyDirect ============\n"
"Input buffer address: 0x%p\n"
"Input buffer size: %d\n"
"Output buffer addres: 0x%p\n"
"Output buffer size: %d\n\n",
pIrp->AssociatedIrp.SystemBuffer,
pStack->Parameters.DeviceIoControl.InputBufferLength,
pOutputBuffer,
pStack->Parameters.DeviceIoControl.OutputBufferLength);
//-f--> Let us check whether the input buffer fits in the output buffer
// buffer before doing the copy.
if (pStack->Parameters.DeviceIoControl.OutputBufferLength <
pStack->Parameters.DeviceIoControl.InputBufferLength)
{
//-f--> Oops!
nts = STATUS_BUFFER_TOO_SMALL;
pIrp->IoStatus.Information = 0;
}
else
{
//-f--> In this case we will have to make the copy, since the input
// buffer and the output buffer are physically distinct
RtlCopyMemory(pOutputBuffer,
pIrp->AssociatedIrp.SystemBuffer,
pStack->Parameters.DeviceIoControl.InputBufferLength);
//-f--> Signals success to the I/O Manager and tells the application the
// number of valid bytes in the output buffer.
nts = STATUS_SUCCESS;
pIrp->IoStatus.Information =
pStack->Parameters.DeviceIoControl.InputBufferLength;
}
//-f--> Close the bill and draw the line.
pIrp->IoStatus.Status = nts;
IoCompleteRequest(pIrp, IO_NO_INCREMENT);
return nts;
}
Neither Buffered I/O nor Direct I/O
This may seem repetitive to you, but in this method, indicated by the METHOD_NEITHER parameter, the I/O Manager will not do anything for you. So, you will have to test the process context and also test access to the buffers as we saw in the previous post. Once again, the big difference here is that we will have two buffers. The input buffer will come through pStack->Parameters.DeviceIoControl.Type3InputBuffer and the output buffer is obtained through pIrp->UserBuffer. The input buffer must be tested with ProbeForRead, since the driver will perform reads on this buffer, and the output buffer must be tested with ProbeForWrite. I think the rest the example code is able to explain. To test the process context, we use the function that was already explained in the previous post.
/****
*** OnCopyNeither
**
** IOCTL handler routine responsible for
** copying the input buffer to the output
** buffer. (using METHOD_NEITHER)
*/
NTSTATUS
OnCopyNeither(IN PDEVICE_OBJECT pDeviceObj,
IN PIRP pIrp)
{
NTSTATUS nts;
PIO_STACK_LOCATION pStack;
//-f--> We get a pointer to the current stack
// location.
pStack = IoGetCurrentIrpStackLocation(pIrp);
//-f--> Output of the obtained values.
DbgPrint("=========== OnCopyNeither ===========\n"
"Input buffer address: 0x%p\n"
"Input buffer size: %d\n"
"Output buffer addres: 0x%p\n"
"Output buffer size: %d\n\n",
pStack->Parameters.DeviceIoControl.Type3InputBuffer,
pStack->Parameters.DeviceIoControl.InputBufferLength,
pIrp->UserBuffer,
pStack->Parameters.DeviceIoControl.OutputBufferLength);
//-f--> Since we are using the Neither method, we have to
// be running in the same context of the process that
// generated the IRP, because we will access User Space in Kernel-Mode.
if (!EstouNoContextoDoProcessoQueGerouEssaIrp(pIrp))
{
//-f--> Oops!
pIrp->IoStatus.Status = STATUS_INVALID_ADDRESS;
pIrp->IoStatus.Information = 0;
IoCompleteRequest(pIrp, IO_NO_INCREMENT);
return STATUS_INVALID_ADDRESS;
}
//-f--> Here we already know we are in the right context, but we still
// need to test the buffers offered by the application.
// We do not want an unfortunate application to send an invalid
// pointer and the system to end up in a blue screen because of it.
__try
{
//-f--> The driver will perform reads on the input buffer
ProbeForRead(pStack->Parameters.DeviceIoControl.Type3InputBuffer,
pStack->Parameters.DeviceIoControl.InputBufferLength,
1);
//-f--> And will perform writes on the output buffer
ProbeForWrite(pIrp->UserBuffer,
pStack->Parameters.DeviceIoControl.OutputBufferLength,
1);
}
__except(EXCEPTION_EXECUTE_HANDLER)
{
//-f--> Ahaaa!!
nts = GetExceptionCode();
//-f--> Completes the IRP and curses the mother of the guy who wrote
// the application (unless it was you yourself).
pIrp->IoStatus.Status = nts;
pIrp->IoStatus.Information = 0;
IoCompleteRequest(pIrp, IO_NO_INCREMENT);
return nts;
}
//-f--> Let us check whether the input buffer fits in the output buffer
// buffer before doing the copy.
if (pStack->Parameters.DeviceIoControl.OutputBufferLength <
pStack->Parameters.DeviceIoControl.InputBufferLength)
{
//-f--> Oops!
nts = STATUS_BUFFER_TOO_SMALL;
pIrp->IoStatus.Information = 0;
}
else
{
//-f--> Close your eyes, say "The blood of Jesus has power",
// believe in Saint Walter Oney and copy the input
// buffer to the output buffer.
RtlCopyMemory(pIrp->UserBuffer,
pStack->Parameters.DeviceIoControl.Type3InputBuffer,
pStack->Parameters.DeviceIoControl.InputBufferLength);
//-f--> Phew! Everyone alive?
// Signals success to the I/O Manager and tells the application the
// number of valid bytes in the output buffer.
nts = STATUS_SUCCESS;
pIrp->IoStatus.Information =
pStack->Parameters.DeviceIoControl.InputBufferLength;
}
//-f--> Close the bill and draw the line.
pIrp->IoStatus.Status = nts;
IoCompleteRequest(pIrp, IO_NO_INCREMENT);
return nts;
}
Compiling the example
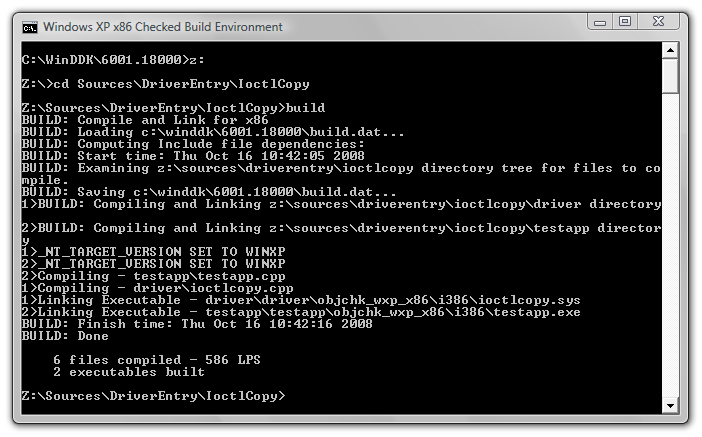
To compile the example available for download, you can use the environment shortcut installed by the WDK and call Build from the example’s root directory. Note that in a single step we compile the driver and the test application. The figure below illustrates this. Or you can use DDKBUILD as I already explained in this other post to compile from Visual Studio.
Fernando, one more question before you vanish into the mist. In the table of Dispatch Routines, which we fill in the DRIVER_OBJECT structure, there is only one entry for IRP_MJ_DEVICE_CONTROL. How did you create a routine for each method? That one I am going to let the example code below answer, but if even so you still have some doubt, just send me an e-mail, which is in my Blogger profile, and then we settle it with our fists.
/****
*** OnDeviceControl
**
** Here we receive all the DeviceIoControl
** sent to the driver and split them into
** routines specific to the handling of each IOCTL.
** The handling of all the IOCTLs could
** be in a single function, but it does not hurt to be
** organized once in a while.
*/
NTSTATUS
OnDeviceControl(IN PDEVICE_OBJECT pDeviceObj,
IN PIRP pIrp)
{
PIO_STACK_LOCATION pStack;
//-f--> We get a pointer to the current stack
// location.
pStack = IoGetCurrentIrpStackLocation(pIrp);
//-f--> Gets the IOCTL code to forward it
// to the right routine, or not. :-)
switch(pStack->Parameters.DeviceIoControl.IoControlCode)
{
case IOCTL_COPY_BUFFERED:
return OnCopyBuffered(pDeviceObj,
pIrp);
case IOCTL_COPY_DIRECT:
return OnCopyDirect(pDeviceObj,
pIrp);
case IOCTL_COPY_NEITHER:
return OnCopyNeither(pDeviceObj,
pIrp);
}
//-f--> Oops! We received an IOCTL different from the ones
// we were expecting.
pIrp->IoStatus.Status = STATUS_NOT_IMPLEMENTED;
pIrp->IoStatus.Information = 0;
IoCompleteRequest(pIrp, IO_NO_INCREMENT);
return STATUS_NOT_IMPLEMENTED;
}
Today I am going to say goodbye (in Portuguese) in the style of mr4nd3r50n, who is a friend that worked with me at SCUA.
Intel mais, já vou Windows!
Leave a Reply